Ever had that moment where you pour your latte art, only to end up with a blob, a scribble, or worse—nothing recognizable at all? I remember countless mornings, frustrated and rinsing my milk pitcher repeatedly, thinking I just wasn’t cut out for barista perfection. It was a lightbulb moment when I realized that the secret wasn’t just in the milk or the espresso, but in the tools I was using—namely, the milk pitcher and the espresso tamper. Once I started paying attention to these tiny but mighty accessories, everything changed.
Why Your Coffee Shots Need the Right Milk Pitcher and Tamper
Choosing the right milk pitcher and tamper isn’t just about aesthetics or tradition; it’s about consistency, control, and ultimately, that beautiful, velvety latte art. I used to think any pitcher would do, but I was wrong. A poor-quality pitcher makes it harder to control milk flow or steam, leading to uneven microfoam. Similarly, an ill-fitting tamper can cause uneven tamping pressure, resulting in inconsistent extraction. Trust me, the difference is night and day. When I invested in a well-designed milk pitcher and a proper tamper, my shots became more precise, and my latte art improved dramatically. It’s like giving yourself a fair shot at barista-level perfection. Want to see your coffee skills soar? Stick around, because I’ll share the tips and tricks that transformed my brewing game.
Is It Really Worth the Investment?
At first, I was skeptical—was spending extra on these accessories really necessary? Turns out, yes. I made the mistake early on of using a generic, inexpensive tamper and a flimsy pitcher, which sabotaged my efforts. I was convinced I just wasn’t talented enough. But once I switched to a calibrated tamper and a pitcher with an ergonomic handle and precise spout, my consistency improved. According to coffee expert Scott Rao, “precision tools are the backbone of quality espresso.” If you’re serious about elevating your coffee game, these investments are worth every penny. Curious about choosing the right tools? Check out this comprehensive guide to barista accessories for precision brewing.
Have you faced similar frustrations with your equipment? I’d love to hear about your struggles and successes. Remember, the right tools aren’t just accessories—they’re your allies in crafting that perfect shot. Next, we’ll dive into how to select the ideal milk pitcher and tamper to suit your style and needs, ensuring every cup is a step closer to perfection.
Pick the Right Milk Pitcher for Consistent Microfoam
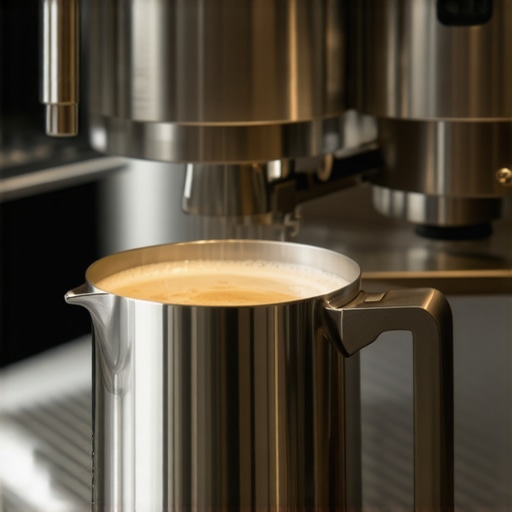
Start by selecting a pitcher that fits comfortably in your hand and offers precise control over milk flow. I once grabbed a generic pitcher without considering size or spout design, which led to splattering and uneven microfoam. When I switched to a 12 oz stainless steel pitcher with a well-designed spout, my milk frothing became smoother and more controllable. Look for a pitcher with a narrow, tapered spout to help you create those beautiful latte art designs. For detailed guidance, check out the best milk pitcher tips.
Evaluate Material and Size
Opt for high-quality stainless steel because it heats evenly and is durable. The size should match your typical milk volume—too small and you’ll struggle with larger drinks, too big and it’s hard to control the milk flow. I recommend starting with a 12 oz pitcher if you mostly make lattes or cappuccinos. Remember, a smaller pitcher offers more control, especially when practicing latte art.
Select an Espresso Tamper That Fits Your Technique
The right tamper is all about fit and weight. I once used a heavy, uncalibrated tamper, which made tamping inconsistent. Transitioning to a calibrated tamper with an ergonomic handle transformed my shots. A good tamper should sit flat on your coffee puck without wobbling. This ensures even pressure across the bed, leading to consistent extraction. For more insights, explore the ultimate tamper guide.
Check the Diameter and Compatibility
The tamper diameter must match your portafilter basket size precisely—most commonly 58mm. Using a tamper that’s too small or too large disrupts the tamping process, affecting shot quality. Before buying, measure your portafilter or verify the size listed by the manufacturer. I learned this the hard way when my inconsistent tamping caused uneven extraction, but switching to a properly sized tamper fixed it.
Practice Smooth, Consistent Movements
Once you have your tools, focus on your technique. For milk steaming, keep the pitcher at the right angle and position the steam wand just beneath the surface of the milk. Start with a gentle swirl to incorporate air, then submerge deeper to heat and texture the milk. My early attempts were messy—milk spilling over or not microfoaming properly—but I improved by watching tutorials and practicing with my new pitcher. Remember, consistency is key. For more advanced tips, see the precision brewing tools.
Apply Even Pressure When Tamping
Place your portafilter on a flat surface or tamping mat. Use your calibrated tamper to press down with steady, even pressure—about 30 pounds of force. Avoid the temptation to rush or use uneven pressure, which can cause channeling. I found that practicing with a scale to measure tamping force helped develop muscle memory. For detailed techniques, review the best tamping practices.
Fine-Tune Your Technique for Perfect Shots
After mastering tool selection, focus on your workflow: preheat your equipment, dose your coffee consistently, and time your extraction. Use a coffee scale to measure precisely. My first attempts with uncalibrated tools resulted in uneven shots, but with consistent use of the right tools, my espresso quality soared. Remember, great tools make your technique more forgiving, but practice still matters.
Maintain Your Equipment Regularly
Keep your milk pitcher and tamper clean and in good condition. Rinse the pitcher after each use and check for dents or corrosion. A well-maintained tool performs better and lasts longer. For maintenance routines, see the maintenance tips.
Many coffee enthusiasts believe that simply owning the right tools guarantees perfect espresso and latte art. However, this is a misconception that can lead to costly mistakes and frustration. Let’s dig deeper into what most people get wrong about barista accessories like milk pitchers and tampers.
Why Quality Doesn’t Always Mean the Most Expensive
It’s tempting to think that the priciest milk pitcher or tamper automatically delivers the best results. While quality equipment is important, the real key is how you use and maintain your tools. For example, a well-made stainless steel pitcher with a good spout can be rendered useless if you don’t learn how to control your milk steaming technique. Similarly, a calibrated tamper is only effective if you consistently apply the right pressure. Remember, mastery over your technique outweighs the initial investment. For more tips on optimizing your equipment, check out this guide to precision brewing tools.
Beware of the Micro-Managing Trap
One common mistake is obsessing over the perfect tool size or material without focusing on technique. For instance, choosing a 58mm tamper is standard, but some believe that a slightly larger or smaller diameter can improve tamping. In reality, consistency in tamping force and technique is far more crucial than the tamper size. Over-analysing minor differences can distract you from practicing proper workflow and control. Remember, tools are there to support your skills, not replace them. For advanced insights, explore how to use scales for precise tamping and extraction.
How Advanced Baristas Perfect Their Micro-Adjustments
Professional baristas understand that small tweaks make a big difference. They use calibrated tampers and fine-tune their milk steaming angles, but what sets them apart is their attention to detail and ability to adapt. For example, slight variations in coffee grind size or ambient temperature may require adjustments in tamping pressure or steaming time. Mastering these nuances comes from experience and observation, not just the tools. If you’re serious about elevating your craft, consider investing in quality scales and advanced accessories that help you measure and refine every step.
Have you ever fallen into this trap? Let me know in the comments. Remember, the secret isn’t just in the tools you buy but in how you use and refine your technique over time. Proper maintenance and consistent practice will turn good equipment into great results. For comprehensive maintenance tips, see these maintenance routines.
Maintaining your barista tools isn’t just about cleanliness; it’s about preserving precision and ensuring long-term performance. Over time, coffee oils, mineral deposits, and regular wear can diminish the effectiveness of your equipment, leading to inconsistent shots and latte art mishaps. Personally, I’ve learned that a dedicated maintenance routine can significantly extend the lifespan of my tools and keep my brewing consistent. For instance, I regularly descale my espresso machine and clean my tamper and milk pitcher with gentle, non-abrasive cleaners to prevent residue buildup. For those who want to elevate their game, investing in quality cleaning brushes and descaling solutions tailored for coffee equipment is essential. I recommend checking out specialized cleaning kits, like those found in the best barista accessories guide for comprehensive options.
How do I maintain my tools over time?
To keep your equipment in peak condition, establish a simple, consistent routine. Rinse your milk pitcher immediately after use to prevent milk residue from drying and becoming hard to remove. Deep clean your tamper and other metal tools weekly with warm water and a mild detergent, ensuring no debris affects tamping consistency. Descaling your espresso machine every few months is crucial; mineral deposits can impair heat transfer and water flow, which directly impacts espresso quality. Using manufacturer-recommended descaling solutions and following their instructions can prevent damage and keep your machine running smoothly. Additionally, inspecting your tools regularly for dents, corrosion, or warping allows early intervention before performance issues arise. For detailed maintenance tips, see the maintenance routines here.
Why investing in quality tools matters for longevity
High-quality equipment might seem expensive initially, but it pays off in durability and consistency. For example, a stainless steel milk pitcher with a solid construction and a precision spout resists dents and corrosion better than cheaper alternatives. Similarly, a well-calibrated tamper with a comfortable grip ensures uniform tamping, reducing the need for replacement. Remember, even the best tools need proper care. A well-maintained, high-end tamper or pitcher can last for years, making your investment worthwhile. Plus, modern innovations like antimicrobial coatings on some tools can further extend their lifespan and hygiene. Looking ahead, the trend toward smarter, self-cleaning equipment may revolutionize how we maintain our tools—imagine tamper handles with built-in cleaning indicators or pitchers with antimicrobial surfaces. To stay ahead, keep an eye on emerging tech in coffee tool maintenance, but for now, sticking to regular cleaning routines remains your best bet.
What’s the best way to keep your tools performing like new?
Consistency in cleaning and inspection is key. After every use, rinse your tools thoroughly—don’t let milk or coffee residue dry. Once a week, give your tamper and pitcher a more thorough clean with warm water and a soft brush, avoiding abrasive cleaners that could damage the surface. For espresso machines, descaling every 2-3 months with a manufacturer-approved solution prevents mineral buildup. Also, periodically check for signs of wear—dents in your pitcher spout or wobbling in your tamper handle—and replace parts as needed. Investing in a dedicated storage space helps prevent damage; a padded drawer or tool rack keeps your equipment safe from accidental bumps. For high-volume cafés, consider implementing a checklist to ensure routine maintenance is never overlooked. This proactive approach keeps your tools performing at their best, ensuring every shot and latte art piece is consistent and beautiful. Want to make maintenance even easier? Try setting reminders on your phone or using specialized cleaning schedules available in the precision brewing tools guide.
The Hardest Lesson I Learned About Barista Accessories
One of my biggest lightbulb moments was realizing that no matter how talented I was, poor-quality tools would always hold me back. Investing in a calibrated tamper and a well-designed milk pitcher transformed my workflow and results, proving that the right accessories are crucial for consistent, beautiful coffee.
3 Myths About Barista Tools That Held Me Back
I used to believe that expensive equipment automatically meant better results. Turns out, mastery over technique and proper maintenance are far more important. High-quality tools can last for years if cared for properly, but they won’t improve your coffee without practice and understanding.
What Experts Won’t Tell You About Coffee Equipment
Many professionals know that perfect tamping and microfoam depend on the details—like the size of your tamper or the spout design of your pitcher. The secret is in how you use these tools, not just owning them. Regular practice, combined with the right equipment, is the real game-changer.
My Essential Toolkit for Barista Success
I’ve trusted precision coffee scales for measuring every shot, a high-quality stainless steel milk pitcher with a narrow spout, and a calibrated tamper for consistent pressure. These tools have helped me elevate my craft and create latte art that truly stands out.
Where to Go from Here
If you’re serious about perfecting your coffee, investing in quality tools is just the beginning. Pair them with dedicated practice, regular maintenance, and continuous learning. Check out the latest accessories guide for more ideas to refine your setup and technique.
Your Turn to Try
Now that you know the secrets, are you ready to upgrade your tools and improve your barista skills? Remember, the journey to perfect espresso and latte art is ongoing—every shot is a new opportunity to learn and refine. What’s the biggest challenge you face with your current equipment? Share below, and let’s grow together!
I completely agree with the importance of investing in good tools like a calibrated tamper and a precise milk pitcher. When I first started, I used basic equipment, and my latte art was hit or miss. Since upgrading to a quality stainless steel pitcher with a narrow spout and a calibrated tamper, my control has improved dramatically, and I find that even my microfoam looks much more consistent. I’ve noticed that mastering the technique with the right tools makes a significant difference. For anyone still debating whether to go for higher-end accessories, I’d say it’s worth it if you’re serious about elevating your espresso game. Has anyone else found that upgrading tools has helped their confidence in latte art or shot quality as much as it did for me?
Reading this post really resonated with my own journey in elevating my coffee skills. I used to think that the quality of my espresso depended solely on the beans and grind size, but I quickly learned that the tools I used played an equally critical role in achieving consistent results. Upgrading to a digital scale, a better tamp, and a finely crafted milk pitcher was a game-changer for me. It’s one thing to watch tutorials, but having the right equipment really bridges the gap between theory and practice. One aspect I’ve been meaning to explore further is the role of pitcher shape in microfoam control—has anyone found that certain spout designs make a noticeable difference in latte art quality? I’d love to hear other experiences about which tools have made the biggest impact in people’s routines.
This post hits home for me because I’ve also learned that the little details—like a good spout or a calibrated tamper—really do make all the difference. I used to think that technique alone could carry my latte art attempts, but it turns out that having the right tools in hand is just as crucial. For example, I recently upgraded to a thinner spouted pitcher, and I noticed how much easier it was to pour those intricate rosettas and tulips compared to my old, generic pitcher. I’m curious, does anyone have recommendations for a go-to tamper for someone just starting to get serious about tamping consistency? I’d love to hear other tips on how to best select tools that match different brewing styles. Personally, I find that pairing high-quality equipment with consistent practice has really boosted my confidence and results. Do you think that focusing on better tools actually shortens the learning curve, or is it something you should gradually upgrade as your skills improve?