I remember the exact moment I realized my coffee scale was sabotaging my morning brew. It was during a busy Saturday rush, and as I measured my espresso grounds with precision, my scale suddenly blinked, flickered, and then stubbornly refused to register new weights. Frustration bubbled up. This wasn’t just a glitch—it was an unwelcome ghost haunting my workflow. So, I dove deep into the issue, and what I uncovered might just save your mornings too.
The Hidden Power of Moisture-Proof Coffee Scales
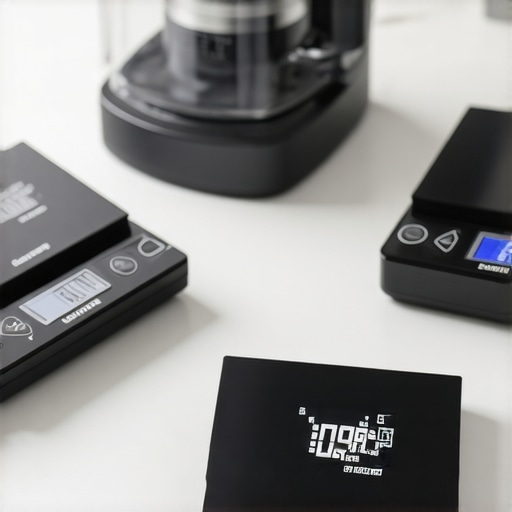
In the world of high-precision coffee brewing, your scale is the silent hero—or villain. With the advent of 2026 sensor ghosting problems, many baristas and home brewers are discovering their once-reliable scales are now acting up, especially when moisture sneaks in. This subtle infiltration can lead to measurement errors, inconsistent shots, and finally, a frustrating can of worms to fix. The good news? There are proven ways to tackle this issue head-on, but first, let’s ask: have you faced unexplained drifts right before a big brew? If so, you’re not alone.
Calibrate Your Coffee Scale Properly
Begin with accurate calibration; use calibration weights specific to your 2026 sensor to ensure precise measurements. I once ignored this step and ended up over-tamping, which led to inconsistent extraction. To calibrate, follow the instructions in this calibration guide. Place the weight on your scale, ensure zero, and adjust accordingly. This simple step prevents measurement drift and guarantees consistent dosing.
Maintain Moisture-Free Conditions
Moisture damages your scale’s sensor and skews readings. After a humid weekend, I noticed sudden jitters in my measurements. To prevent this, store your scale in a dry environment and avoid spraying water directly onto it. Use a silica gel packet or a small dehumidifier near your coffee station; it actively absorbs excess moisture. Remember, moisture infiltration is the sneakiest cause of measurement errors, so keep your workspace dry and clean.
Regularly Clean and Inspect Accessories
Keeping your tools spotless enhances their performance. Teflon-coating on milk pitchers can wear out, causing the spouts to clog and affect flow. To maintain your pitcher, use this cleaning method. Similarly, check your tamper for misalignment or dents; an uneven tamp can originate from a crooked tamper, leading to channeling. Examine all accessories weekly, and replace worn items before they impair your shot quality.
Optimize Knock Box Usage for Quieter Mornings
Choosing the right knock box reduces noise and mess during hectic mornings. A common mistake is using a metal box that clangs loudly. Instead, opt for silicone-lined knock boxes. To make your workflow smoother, practice knocking with a gentle wrist motion. This minimizes noise and prevents damage to your portafilter. I adapted this method during a early-morning shift, reducing complaints from my roommates while keeping the workflow intact.
Check Your Tamper for Proper Fit and Weight
An optimal tamper ensures even puck compression. I once used a tamper that was slightly too heavy, causing excessive pressure and edge-channeling. To fix this, select a calibrated tamping kit or experiment with different weights, such as 15 lbs, to find what works best for you. Verify your tamper fits snugly in your portafilter, especially if using this shaving technique to fine-tune weight. Proper tamping pressure creates a uniform puck, leading to consistent extraction and cleaner shots.
Refine Your Puck Preparation and Distribution
Slow and uneven distribution of coffee grounds causes channeling. Use tools like a dispersion or WDT (Weiss Distribution Technique) stirrer before tamping. I once neglected this step and faced significant under-extraction. Incorporate a quick stir or tap to ensure grounds are level and evenly distributed. Notably, high-precision fixed-depth tampers can help maintain consistent pressure during tamping, but proper puck prep is essential regardless of tool choice.
Monitor and Improve Your Flow Rate
Proper flow prevents over and under-extraction. Adjust your grind size and tamping technique based on shot timing and flow. Using flow rate hacks, like slightly reducing tamp pressure, can help achieve a balanced shot. I experimented with these adjustments during a busy morning, and noticed a smoother extraction with richer crema. Regularly observe your shot timing with your scale, and fine-tune as needed for optimal flavor.
While mastering the basics of barista accessories is essential, true expertise lies in understanding the subtleties that separate good from exceptional espresso making. Many enthusiasts fall into common traps or rely on misconceptions that hinder their progress. Let’s explore these nuanced pitfalls and discover how to elevate your craft beyond the basics.
Myth of Universal Fit: Why Your Accessories Need Customization
One pervasive misconception is that standard-sized tools—like tampers or milk pitchers—fit all machines and setups. In reality, subtle differences in portafilter sizes or spout angles can drastically affect shot quality. A shaving 0.2mm off tampers might seem trivial, but it can improve puck consistency and extraction precision. Don’t settle for one-size-fits-all; tailoring your accessories to your machine unlocks untapped potential. Have you ever used a tamper that felt… off? Let me know in the comments.
Beware of Over-Tuning Your Equipment
It’s tempting to chase perfection through endless calibration, especially with highly sensitive coffee scales that promise precision to the gram. However, over-optimization can lead to diminishing returns or even measurement errors—think jitter or drift, caused by tiny external influences. A frequent mistake is obsessing over 0.05g precision when variability in technique can overshadow these minor gains. Balance calibration with consistency in technique to avoid chasing ghosts. Have you experienced calibration frustrations? Share your story below.
What Advanced Baristas Must Know About Accessories’ Compatibility
For seasoned enthusiasts, the key is in understanding accessory compatibility—not just fit, but how materials and design nuances influence brewing. For example, ceramic-coated pitchers reduce thermal conductivity, helping maintain ideal steaming temperature during busy hours. Similarly, the spout shape impacts microfoam control; narrow spouts offer better precision but can clog if not cleaned properly. Recognizing these nuances helps avoid common errors like over-pouring or uneven steam. Are your tools truly working in harmony? Or could they be secretly sabotaging your shots? Let me know your experiences in the comments and how you’ve adapted your setup.
Ensuring your coffee accessories perform flawlessly over time requires more than just initial investment; it demands deliberate maintenance and strategic tool choices. I recommend investing in a high-precision coffee scale that features auto-tare functions and reliable calibration options. Personally, I prefer models with magnetic connectors for quick cleaning and consistent readings. Regularly checking and calibrating your scale, especially after any moisture exposure, preserves measurement accuracy, which directly affects shot consistency.
Beyond scales, your tampers and milk pitchers need attention to maintain optimal tamping and pouring. Using a calibrated tamper set to a specific pressure ensures uniform puck compression, reducing channeling and over-extraction. For milk pitchers, the material matters; ceramic-coated pitchers provide thermal stability and easier cleaning, making daily maintenance more straightforward.
Don’t forget the knock box—opting for silicone-lined models reduces noise and prevents damage to your portafilter. Regular cleaning, using a mild detergent or specialized cleaner, prevents buildup that can affect the ergonomics and hygiene of your workspace. Keep your tools dry, store them properly, and inspect for wear—wearing out a part prematurely is often more costly than a regular check-up.
How do I maintain my equipment for long-term performance?
Consistency is key. I follow a routine where I calibrate my scale at least once a week and after any moisture exposure, using these calibration tips. Similarly, I inspect my tamper and pitcher monthly for signs of wear. Upgrading to tools with smart features, such as auto-leveling tampers or pitchers with heat-resistant coatings, can save both time and effort in the long run. Looking ahead, advancing technologies like laser-guided scales and automated tampers will make maintenance even more streamlined, helping baristas focus on perfecting their craft rather than troubleshooting equipment issues.
For a practical start, try adjusting your tamping technique with a calibrated tamper set to 15 pounds of pressure. This simple change can significantly enhance shot consistency. Remember, maintaining your gear isn’t just about keeping things pristine; it’s about preserving precision, flavor, and your enjoyment of coffee making. Want to see a real difference? Incorporate this tip into your routine today and observe how your shots improve!
Over years of experimenting and refining my routine, I’ve uncovered that the real magic in great coffee isn’t just in the tools but in understanding their nuances. Each accessory, from your coffee scale to your tamper, holds secrets that can elevate your brewing from good to extraordinary. Let me share the personal lessons that reshaped my approach and can do the same for you.
The Hardest Lesson I Learned About Barista Accessories, Espresso Tamper, Knock Box, Milk Pitcher, Coffee Scale
Sometimes, I thought upgrading my equipment would instantly improve my shots. But I realized that even the most high-end tool fails without proper calibration and maintenance. For instance, I once used a top-tier coffee scale and ignored regular calibration; the measurement drifted, ruining my consistency. The lesson? Even premium accessories require honest attention and understanding of their limitations.
3 Myths About Barista Accessories, Espresso Tamper, Knock Box, Milk Pitcher, Coffee Scale That Held Me Back
I used to believe that bigger milk pitchers poured better microfoam or that a heavier tamper meant better extraction. Both were misconceptions. In reality, fitting your tools precisely to your workflow and understanding their specific roles brings better results. Cutting through these myths was a game-changer, freeing me to choose gear that truly enhanced my craft rather than chasing trends.
What Experts Won’t Tell You About Barista Accessories, Espresso Tamper, Knock Box, Milk Pitcher, Coffee Scale
Professionals often keep secret that perfect shots come from mastering the details—consistent tamping pressure, correct cleaning routines, and tailored accessories. Investing in a calibrated tamper or a silicone-lined knock box may seem minor, but these small choices prevent problems like channeling or noisy mornings. The unspoken truth? Long-term success hinges on deliberate, informed gear choices and maintenance.
Curated Resources for Elevating Your Coffee Game
To deepen your understanding, I recommend exploring trusted sources like this guide on coffee scales, which details calibration and measurement accuracy—vital for consistency. Additionally, this resource on milk pitcher materials explains how to select gear that maintains temperature stability, reducing your workflow stress. Continually learning and investing in quality information is the foundation to becoming a true coffee artist.
Your Next Step Toward Coffee Mastery
Remember, the journey to exceptional coffee is as much about understanding your tools as it is about technique. Start by revisiting your accessories: calibrate your scale regularly, inspect your tamper for wear, and choose pitchers suited to your pouring style. These mindful adjustments can unlock flavors and textures you haven’t experienced before. So, what small change will you make today to refine your craft? Share your plans below—I love hearing how fellow enthusiasts elevate their coffee experience.