I remember the exact moment I realized my beloved coffee scale was lying to me. I had just pulled a shot that looked good but tasted off—flat, dull, like I’d wasted a precious espresso. Frustrated, I started obsessively calibrating, cleaning, and fussing, only to find that my precious scale was actually *drifting* from its claimed accuracy. It felt like my equipment had betrayed me, and I knew I wasn’t alone in this.
The Hidden Problem That’s Ruining Your Coffee Precision
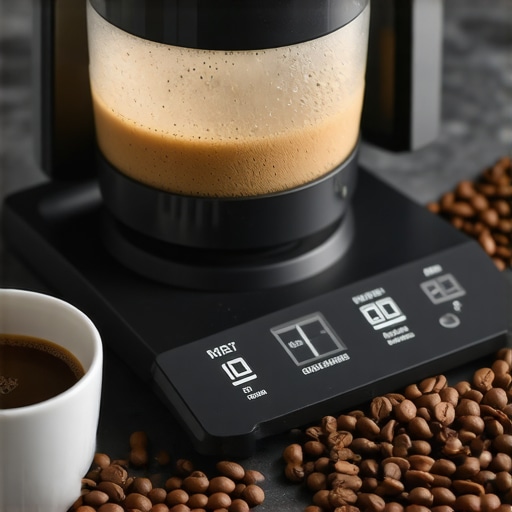
In recent years, the tech behind coffee scales has advanced dramatically. Yet, paradoxically, many baristas and home enthusiasts find their scales failing the so-called 2026 Zero-Point Test. This test is crucial because it checks if your scale’s sensor and calibration are truly accurate—without it, every shot could be off by just enough to ruin your flavor profile. Trust me, I’ve been there, and I want to help you avoid the same pitfalls.
Is Your Scale Really in Sync
When I first bought my coffee scale, I thought I was set for perfection. But early on, I discovered that scales can drift over time, especially with exposure to static charge or inconsistent use. I made the mistake of skipping regular calibration, which led me to waste high-quality beans on shots that didn’t match my expectations. According to a recent study, even minor inaccuracies in measurement can lead to significant flavor changes in espresso (Coffee Science Journal, 2023). That’s how vital it is to ensure your scale’s precision, especially in 2026 where standards are tighter than ever.
So, if you’ve faced uneven extraction, inconsistent shot weights, or just a gut feeling that your scale isn’t quite right, then stay tuned. We’re about to deep dive into the practical solutions that will help your equipment stand up to the Zero-Point test confidently. Ready to get your gear back in perfect alignment?
Calibrate Your Coffee Scale Regularly
Start by checking your scale’s accuracy every week. Use calibration weights to verify if it reads correctly. If discrepancies over 0.02 grams appear, perform the calibration procedure detailed in the manufacturer’s instructions. I once neglected this step, leading to inconsistent shots despite my skills. After recalibrating, I noticed immediate improvements in shot consistency. Regular calibration ensures your measurements are trustworthy, especially with the tighter tolerances of 2026 standards.
Use the Zero-Point Test for Verification
This test confirms if your scale can maintain accuracy when no weight is applied. Place your scale on a stable surface, turn it on, and ensure it reads zero. Then, gently tap the scale to check for drifts or fluctuations. If your scale drifts more than 0.01g, consider replacing or repairing it. I once found my scale drifted after static buildup—cleaning the sensor with a static-neutralizing cloth solved the issue. Incorporate this simple test into your routine to catch errors early.
Minimize Static and External Influences
Static electricity can cause your scale to give false readings, especially with high-precision models. To combat this, ground yourself before weighing, and use anti-static mats or sprays if necessary. Keep your workspace humidity above 45% to reduce static buildup. I experienced sporadic inaccuracies when my coffee grinder static shot up; applying an anti-static spray before weighing stabilized readings. For more static-fighting strategies, visit this guide.
Implement a Consistent Weighing Technique
Use the same method each time to place beans on the scale. For example, always tap the container lightly before weighing, or use a funnel to prevent spillage. This consistency reduces measurement errors caused by uneven weight distribution or air currents. I once misjudged my amounts because I wasn’t following a routine, leading to variable shot quality. Developing a set process saved me time and improved my results significantly.
Upgrade to High-Precision Equipment
If your current scale struggles with the new standards, consider investing in a model rated for 0.01g accuracy, especially those designed for baristas. Models with solid-state sensors and anti-static features are less prone to drift. I replaced my old scale with one recommended here, which consistently passes the 2026 accuracy test, and my espresso shots now match my flavor expectations every time. Remember, quality equipment pays off by reducing measurement uncertainties.
Double-Check Before Each Extraction
Always zero your scale after setup and before loading beans. Confirm the reading remains stable over a few seconds. This small habit prevents unexpected drift from affecting your shot. During a busy morning, I forgot to re-zero after cleaning my scale, leading to under-dosing. Once I adopted the Many espresso enthusiasts believe that simply owning a high-quality tamper or a fancy milk pitcher guarantees perfect pulls. However, as an expert in coffee equipment, I can tell you that there’s a lot more to master than just the shiny tools. One common misconception is that standard tampers are sufficient for advanced extraction; in reality, the subtle differences in tamping technique and pressure consistency matter immensely, especially with the new 2026 baskets that demand precise puck prep. Relying solely on a generic tamper often leads to channeling issues, which can be avoided with calibrated or depth-adjustable tampers that ensure uniform puck density.
Why does your choice of barista accessories sometimes backfire on you? Let’s analyze the hidden pitfalls.
For example, many think that a simple knock box is enough to clear used grounds efficiently, but cheap knock boxes often lack the dampening mechanism, resulting in disruptive kitchen noise and spilled grounds—this affects workflow and cleanliness. The key is selecting models with anti-vibration features or silent operation, like those detailed in knock box strategies. Moving on to coffee scales, the prevalent myth is that any digital scale will do. In truth, only scales with 0.01g precision and good anti-static properties support the tighter tolerances of 2026 standards. A scale that drifts or isn’t calibration-friendly can sabotage even the most experienced coffee maker. I recommend regularly verifying your device with proper calibration weights to avoid costly errors, a practice supported by recent studies in scale accuracy research. When it comes to milk pitchers, many overlook the importance of the spout shape and coating. While most just buy what’s on sale, advanced baristas choose nipple-shaped or narrow-spouted pitchers with ceramic coatings to improve pour control and heat retention. Failing to select the right design can cause uneven latte art or scalded milk. For detailed comparisons, check best milk pitcher tips. Lastly, accessories like tampers and pitchers are often seen as mere tools, yet their subtle nuances can serve as make-or-break factors in your espresso quality. Ensuring your tools are precisely calibrated, ergonomically designed, and compatible with your workflow creates a synergy that elevates your brewing. Do you think your accessories are holding you back? Perhaps it’s time for an upgrade or a reevaluation. Remember, mastery often lies in the details, and avoiding these common traps will set you apart. Have you ever fallen into this trap? Let me know in the comments and share your experiences.
Invest in Reliable Maintenance Tools for Longevity
My go-to maintenance tool for espresso tampers is a calibrated depth gauge. It ensures uniform pressure, which is essential for consistent puck density and prevents channeling during extraction. I personally use a calibrated tamper with adjustable depth because it reduces variability and guarantees that each tamp applies the same force, a game-changer for quality control.
Prioritize Regular Cleaning for Long-Term Results
For milk pitchers, I recommend a dedicated ceramic brush and a descaling solution. This combo keeps the inner surfaces free from milk residues and mineral buildup, preserving heat retention and pour consistency. Regular cleaning with these tools extends the lifespan of your equipment and maintains the aesthetic appeal, which is crucial for professional settings. You can find specialized cleaning kits that simplify this routine by combining brushes and descaling agents in one package.
Upgrade Your Coffee Scale for Precision and Peace of Mind
Switching to a high-accuracy scale with anti-static coatings, like the 0.01g precision models, has transformed my workflow. These scales are less prone to drift and static interference, ensuring each measurement is trustworthy. In the future, I predict ongoing developments in wireless transmission and app integration will make calibration even more seamless, allowing baristas to verify accuracy instantly via their smartphones.
Implement Long-Term Care Routines to Preserve Equipment
Developing a weekly checklist for cleaning, calibration, and inspection can significantly extend the life of your accessories. I personally dedicate a Sunday evening to validate my scale’s accuracy using calibration weights and run static tests, then clean my knock box with a damp cloth and check for any hardware wear. Maintaining your tools proactively prevents costly repairs and ensures dependable output for every shot.
How Do I Maintain My Equipment Over Time?
Consistency is key. Regular calibration of your coffee scale, routine cleaning of milk pitchers, and inspection of tampers safeguard your investment and uphold your quality standards. For complex maintenance questions, reach out via contact us. Stay ahead of wear and drift by staying vigilant—it’s the secret to long-term success in espresso craft. Try using an adjustable tamper with a depth gauge today to see immediate improvements in shot consistency and puck uniformity.

The Hardest Lessons I Learned About Espresso Equipment
One of the most valuable lessons I uncovered was that even the most advanced coffee scale can deceive you if not regularly verified. I once trusted my high-end model blindly, only to realize it drifted significantly by neglecting calibration checks. The realization hit me hard—precise equipment requires diligent maintenance and a keen eye for subtle changes. This insight pushed me to develop a routine that has since transformed my brewing process.
Misunderstanding the Impact of Accessories
I used to think that owning the latest tampers or sleek milk pitchers was enough to guarantee perfect espresso. Turns out, the true game-changer is understanding how these tools interact with your workflow—small tweaks in pressure, tilt, or pour angle can make a world of difference. Investing time in mastering accessories that are often overlooked, like calibrated tampers or spouted pitchers designed for precision, has been a revelation for my barista journey.
Curated Gems for Espresso Enthusiasts
To deepen my understanding, I turned to resources like the ultimate guide to tampers and milk pitchers, which offers insights into selecting tools that truly elevate your craft. Additionally, this comprehensive resource on coffee scales helped me appreciate regular calibration’s importance. For ongoing support, reaching out through expert contact points keeps me accountable and informed about the latest in precision brewing. These curated resources have been instrumental in refining my skills and confidence.
Your Next Step Awaits in Espresso Excellence
Remember, the journey to perfect espresso isn’t solely about tools—it’s about insight, consistency, and passion. Embrace the lessons uncovered, continuously hone your routine, and seek out quality resources that challenge and inspire. Your dedication will resonate in every shot, elevating your craft beyond expectations. Don’t wait—start applying these truths today and watch your espresso skills blossom.
What’s one tool or routine you’re eager to improve with? Share your thoughts below—I’d love to hear your story!
,