Ever felt that sinking frustration when your espresso shot just isn’t as perfect as it should be? Maybe your puck looks a bit tilted, or your tamping feels like a guessing game. I remember those mornings—trying to recreate that barista-quality shot, only to end up with uneven extraction and a less-than-stellar brew that ruins my entire day. That lightbulb moment hit me hard: my tamping technique was the culprit, especially the way I was locking in this crucial step.
Why Proper Tamp Locking Changes Everything
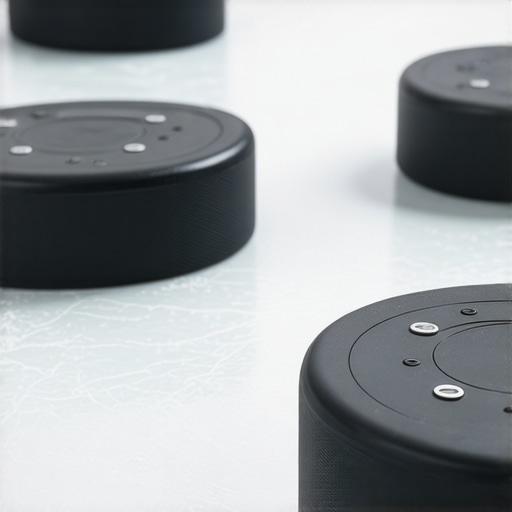
Mastering the art of tamping isn’t just about pushing down evenly; it’s about locking in your coffee bed at the right depth and angle to guarantee consistent extraction. This is where the innovative Stop the Lean: 4 Depth-Locking Tampers for 2026 come into play. These tools are designed to eliminate uneven puck formation caused by common tamping errors, ensuring every shot tastes as good as the first. Once I started using these tampers, my shots became more predictable, my machine’s performance improved, and I finally started enjoying my mornings again.
What Makes Depth-Locking Tampers Stand Out?
Traditional tampers often lead to inconsistency—press too hard, tilt slightly, or underestimate the depth needed. These tiny mistakes compound over time, resulting in channeling or under-extraction. The depth-locking feature of the latest tampers ensures your tamp is not only level but also set at just the right depth, making your shots more uniform. And trust me, after initial skepticism, I was amazed at how much this simple change improved my espresso quality.
But I get it—there’s always that lingering doubt: Are these fancy tampers really worth the hype? Or am I just falling for another coffee gadget gimmick? If you’ve faced similar doubts or felt your shots are inconsistent despite using high-end equipment, you’re not alone. Early on, I made the mistake of thinking that a more expensive tamper alone would solve my problems without addressing tamping technique. That was a costly misconception. To truly elevate your brewing game, understanding how these tools work in harmony with your technique is essential, and I’ll guide you step-by-step through this process.
Next, let’s dive into how choosing the right tamper can dramatically boost your hatching of the perfect puck and keep those stubborn puck leanings at bay. Click here to explore more about the best tampers for 2026 and avoid common pitfalls.
Nail the Tamping Position with Precision
Start by gripping your tamper with a firm, comfortable hold. Position it directly over the center of your coffee bed, aligning your wrist to avoid any tilt. As I did during a busy morning rush, I made sure to steady my hand over the puck, imagining it as balancing a tray of fragile glasses. This mental image helped prevent tilting. Carefully apply downward pressure evenly—think of pressing a button with deliberate force—not too hard, not too soft. Repeat this consistent motion each time to build muscle memory and ensure every shot is uniform.
Lock Your Tamp at the Correct Depth
Using a depth-locking tamper simplifies this step significantly. Once the tamper reaches the preset depth, it stops automatically, eliminating guesswork. I once tried a manual tamper after using one with depth-locking features, and I noticed my shots became inconsistent—sometimes under-extracted, sometimes over. Now, with the tamper set to the right depth, I press until I hear or feel the stop, ensuring complete puck compression. For optimal results, select a tamper with adjustable depth settings—check out models with customizable depth to cater to different coffee grind levels.
Ensure Even Pressure and Alignment
Apply steady, vertical pressure, making sure your wrist remains straight and your elbow close to your body. Imagine pressing a button directly down—no side pressure or leaning—that’s how your puck should be compressed. During a particularly hectic morning, I found my hand shaking slightly, causing uneven tamping. I immediately paused, reset my grip, and adjusted my stance to keep my wrist aligned. This simple fix led to significantly better extraction and a smoother shot.
Maintain Consistency with Technique and Tools
Using a calibrated tamper that matches your coffee basket size—typically 58.5mm or 58mm—is crucial. An ill-fitting tamper can cause uneven puck compression, leading to channeling and inconsistent espresso quality. Remember, regular checks and maintenance keep your tamper in top shape, ensuring the pressure remains uniform. I dedicated some time to calibrating my tamper using calibrated kits, which improved my tamping consistency drastically.
Practice and Adjust Your Force
Consistent pressure comes with deliberate practice. Start by applying a moderate force, roughly equivalent to pressing a doorbell for a second, then refine your technique. Over time, you’ll develop a sense of the right pressure—no need to squeeze the tamper like a stress ball. During a trial session, I deliberately varied my pressure to see how it affected extraction timing. Noticing that too much force caused quick over-extraction, I adjusted to a lighter, consistent touch. This awareness is key to mastering the core step of tamping.
Use Feedback to Improve Your Technique
Observe the quality of your shots after tamping. Uneven extraction and channeling are signs of inconsistent tamping. If your machine has a pressure gauge, monitor the flow; if not, taste and observe crema quality. Incorporate regular reviews—they will guide you to fine-tune your pressure and alignment. Remember, perfect tamping is a learned skill, so remain patient and attentive to each detail, from tamp height to wrist angle. For more tips on maintaining your tools and honing your technique, see the comprehensive guide here.
Many coffee enthusiasts focus on the obvious tools—the scale, milk pitcher, or tamper—believing that possessing the latest equipment guarantees perfect espresso. However, this mindset often leads to critical mistakes rooted in misunderstanding the nuanced mechanics and capabilities of these accessories. Let’s dig deeper into the hidden truths behind common barista gear, so you can elevate your brewing game beyond basic assumptions.
Why Bigger Isn’t Always Better with Coffee Scales
It’s a widespread belief that the larger the coffee scale, the better the precision. But in my experience, oversized scales often introduce static charge and lag, especially in humid environments. These issues can cause inconsistent readings, sabotaging your shot quality. Instead, more refined, compact scales with features like anti-static technology provide superior accuracy and responsiveness. Don’t fall for the trap of assuming size correlates with quality; focus on tech details that influence real day-to-day performance.
Milk Pitches That Sabotage Your Latte Art Progress
Many baristas overlook the importance of spout shape and material. While a fancy Teflon coating might seem appealing, it often causes uneven pouring and resistance, especially if not well-maintained. Surprisingly, Teflon-free pitchers with reinforced rims deliver more consistent flow and cleaner latte art. The secret is in the subtle design nuances—like the spout angle—that influence flow rate and pour control. When selecting your equipment, assess these fine details, not just aesthetic or brand reputation.
Barista Accessories That Might Hinder Speed and Consistency
Counterintuitively, the very accessories meant to streamline workflow can sometimes cause delays if not used correctly. For example, a precision scale with overly sensitive settings might lead you to obsess over tiny weight fluctuations, wasting precious seconds. Similarly, an improperly calibrated knock box can slow down the cleanup process. The key is understanding how these tools behave in real-world settings and calibrating or customizing their use accordingly. Remember, a tool’s sophistication is pointless if it adds complexity rather than efficiency.
Can High-End Accessories Diminish Your Control?
It’s a paradox that over-specification can sometimes diminish a skilled barista’s control. For instance, ultra-sensitive scales or overly complex tampers can tempt users into overanalyzing every action, leading to analysis paralysis. Instead, focus on mastering fundamental techniques first; then, gradually incorporate advanced tools to gain precision without losing intuition. Studies, such as those summarized by industry experts, suggest that complexity hampers consistency if not paired with solid foundational skills.
Do you ever fall into this trap of overspending on gadgets without mastering the basics? Let me know in the comments. Remember, the real power lies in understanding and optimizing what you already have, then fine-tuning your gear for maximum impact.
By appreciating these nuanced aspects—like the effects of static on scales, subtleties in pitcher design, or the complexity of accessories—you avoid common pitfalls and set yourself apart as a confident, knowledgeable barista. Want to explore how to better calibrate your tools? Check out this guide on mastering coffee scales. Elevate beyond the basics, and turn your coffee routine into a science of mastery!
Investing in Durable Tools and Reliable Maintenance Methods
To maintain top-tier coffee quality, selecting high-quality equipment is essential. I personally swear by the must-have barista accessories that consistently deliver precision and durability. For instance, my espresso tamper of choice is a calibrated, 58.5mm model with a fixed depth setting, ensuring uniform puck compression every time. Using tools designed for longevity minimizes the need for frequent replacements and keeps your workflow smooth.
Regular maintenance routines are equally vital. I recommend daily rinsing of milk pitchers with warm water and performing a weekly deep clean with appropriate descaling solutions. This approach prevents buildup and prolongs the functional life of your accessories. For comprehensive maintenance strategies, check out this calibration and upkeep guide.
How do I maintain my equipment to ensure long-term performance?
Consistent use of tools like a coffee scale helps in achieving precise measurements, which are crucial for extraction quality. I personally use a high-precision barista scale that offers accurate readings down to 0.01 grams. To keep such scales accurate over time, I regularly recalibrate them using manufacturer-recommended procedures, which I detail in this calibration guide. This routine ensures consistent results and prevents drift.
Additionally, tools like knock boxes with rubber bottoms are excellent for efficient cleanup without damaging surfaces, especially when used with the right technique. If your knock box begins to emit unwanted odors or shows signs of wear, replacing or deep cleaning it with specialized products can restore functionality. Check out these strategies for knock box maintenance.
Future Trends and How to Stay Ahead
As technology advances, expect more integrated smart tools that automatically calibrate and alert you to maintenance needs, such as sensors in coffee scales or automated tampers. Staying ahead involves not only adopting these innovations early but also understanding their operation deeply enough to troubleshoot effectively. For example, the recent industry publication discusses the impact of static charge on scale precision—something I now actively manage with anti-static mats and regular calibration.
For the dedicated enthusiast, I highly recommend trying the advanced tip of regularly calibrating your scale using the detailed procedures outlined in the linked guide. This small investment in time can significantly improve your shot consistency and is a game-changer in the long run.
Remember, the key to keeping your gear working seamlessly is a combination of selecting durable, purpose-built tools and establishing a disciplined maintenance routine. Don’t overlook the importance of these steps—they’re what truly separates a home brewer from a seasoned barista. For comprehensive advice and specific maintenance routines, dig into this detailed guide.
The Little Lessons That Changed Everything
One of my biggest realizations was how seemingly minor adjustments, like calibrating my coffee scale weekly, directly impacted shot consistency. Over time, I learned that my tamping technique’s consistency was more crucial than I initially thought, especially in relation to the tamper’s depth-locking capabilities. It’s easy to overlook how vital equipment maintenance and technique harmony are—these lightbulb moments made me rethink my entire approach to brewing.
Another insight was understanding the hidden mechanics of milk pitchers. Investing in Teflon-free, well-designed pitchers with precise spout angles dramatically improved my latte art and pour control. These small, intentional choices boosted my confidence and elevated the presentation of every cup.
Lastly, I discovered how static charge affects precision scales. Using anti-static mats and regularly recalibrating my scale prevented erratic readings, which previously led to inconsistent extractions. Embracing these lessons taught me that mastery involves attention to detail and continuous refinement, even in things as tiny as adjusting grip or cleaning tools.
Tools That Transformed My Coffee Routine
For anyone looking to level up, I highly recommend starting with a calibrated, purpose-built coffee scale. This guide became my go-to resource for understanding how to keep my scales accurate over time. Second, a premium Teflon-free milk pitcher with a narrow spout has been a game-changer for latte art; it allowed me smoother pours and cleaner designs. Lastly, a reliable knock box with a rubber bottom saved me from annoying kitchen odors and made cleanup swift—small upgrades that felt monumental in my workflow.
Turning Passion Into Practice
Your next espresso session is your chance to apply these insights—embrace curiosity, refine your technique, and cherish the small wins. With each coffee, you’re not just making a drink; you’re perfecting an art. Remember, the journey to exceptional coffee isn’t about perfection overnight but consistent growth and experimentation. If you’re eager to push your skills further, these tools and tips will help you stay on the right path. Keep brewing, stay curious, and let every cup reflect your passion.
Your post really resonated with me, especially the emphasis on the importance of technique alongside the right tools. I’ve also experienced how even slight deviations in tamping angle or pressure can significantly affect shot consistency. I recently started experimenting with depth-locking tampers after noticing my shots varied quite a bit, and I must say, setting the right depth has made a noticeable difference. However, I still find that maintaining perfect wrist and arm alignment during tamping can be tricky, especially when rushing. Do you have any tips for developing muscle memory to keep those adjustments automatic, even during busy mornings? I believe that combining good tools with mindful practice is key, but I’d love to hear if you have specific drills or routines to build consistent tamping habits. Also, I wonder how many other enthusiasts have found that investing in quality tampers and training their technique has actually saved time in the long run by reducing shot errors.