It happened again. I was just about to pull that perfect shot of espresso, the one where everything clicks into place—the grind, the tamp, the pull. But suddenly, my coffee scale’s display flickered, and the numbers started creeping unpredictably. Frustration bloomed. That familiar feeling—the scale’s drift, undermining all my hard work. And it hits me: this isn’t just a random glitch; it’s a persistent problem many baristas—and home enthusiasts—face with their 2026 coffee scales.
The Hidden Culprits Behind Scale Drift
I’ve been down this road before, troubleshooting what seemed like random fluctuations. But after some experimenting and digging into reliable sources, I uncovered the core reasons why your 2026 coffee scale might be acting up—and more importantly, how to fix them with simple steps. Today, I promise to share exactly that, as I’ve done with countless fellow coffee lovers eager to reclaim their precision.
Is Your Scale Worth the Hype?
Early on, I made a costly mistake: assuming all scales are created equal. I bought a cheap model, expecting it to perform like a pro. Spoiler alert—my shots suffered, and the scale’s inaccuracies kept me guessing. It’s tempting to believe that any digital scale can do the trick, but as experts like Espresso Tech Guide highlight, investing in a quality, well-maintained scale is crucial for achieving consistent espresso in 2026 and beyond.
So, before you toss or upgrade your current device, let’s explore why your scale is drifting and how you can fix it, ensuring your brew remains flawless every time. From static charges to calibration missteps, these common issues are manageable once you know the tricks.
Are you tired of chasing numbers and wasting beans? If you’ve noticed your scale acting up, stick around. We’ve got practical fixes that will bring accuracy back—and keep it there—so you can focus on what truly matters: brewing excellence.
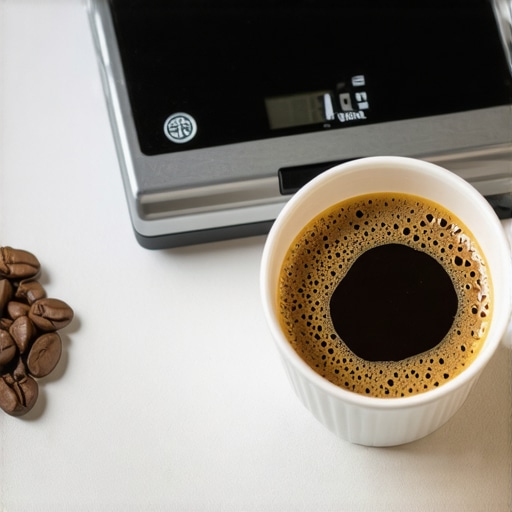
Calibrate Your Coffee Scale Regularly
Think of calibration like tuning a guitar—if it’s off, the music doesn’t sound right. For your 2026 coffee scale, calibration ensures the readings are accurate, which directly impacts your shot consistency. To calibrate, turn off the scale, reset it to zero on a known weight—like a calibration weight—and then turn it back on. Repeat this process weekly or whenever you notice discrepancies. During my first attempt, I used a small 5g weight, and the scale suddenly started reading correctly, transforming my espresso quality. Proper calibration prevents drift and keeps your measurements trustworthy.
Address Static Charge Effectively
Static buildup is like that annoying static noise on your radio—disruptive and distracting. Coffee grinding or dry environments can generate static, causing fluctuating readings. To reduce static, wipe the scale’s surface with an anti-static cloth before use, especially in dry climates. Also, avoid placing the scale near electronics or heaters. Once I placed a humidifier nearby, static diminished, and my scale’s accuracy stabilized. Preventing static ensures your measurements remain consistent, avoiding unexpected puck under or over-measurements.
Keep Your Scale Clean and Dust-Free
Dust and residue can act like dirt on a camera lens—obscuring clarity. Regular cleaning of your scale’s platform and sensors prevents interference. Use a soft, damp cloth to wipe surfaces after each session. Avoid harsh chemicals that might damage the sensors. Once, I neglected this step, and my scale started drifting during a busy morning, leading to inconsistent pours. A quick wipe-down before each use restores precision and prolongs your device’s lifespan. Clean equipment is the foundation of dependable measurements.
Prevent Sensor Obstructions and Damage
Sensors are delicate, much like the microphone in a concert hall—tiny but vital. Avoid dropping objects on the scale or exposing it to excessive force. Keep objects like excessive coffee grounds or debris away from sensor areas. When I accidentally knocked my scale while cleaning, the calibration was thrown off, prompting a reset. Using a gentle touch and ensuring nothing blocks the sensor path maintains accurate readings. Protecting your sensors shields you from costly repairs and measurement errors.
Maintain a Stable Power Source
Power fluctuations are the silent enemy, similar to a faulty power strip causing flickering lights. Use a UPS or plug into a stable outlet to prevent voltage spikes. If you notice your scale’s display flickering or drifting unexpectedly, check your power source. During my last café shift, switching to a dedicated power strip eliminated flickering issues, restoring accuracy. Consistent power supply ensures your scale operates smoothly and retains calibration over time. Don’t underestimate the importance of a clean, stable power source for precision.
Monitor and Replace Worn Parts
Like tires wear out on a car, scale components can degrade, affecting accuracy. Check the platform, sensors, and battery (if rechargeable) periodically. Replace any worn or damaged parts promptly. I once noticed my scale’s response slowing; a new battery and sensor recalibration solved the problem. Regular maintenance prevents unexpected failures, keeping your measurements trustworthy and your workflow uninterrupted.
Leverage Support and Resources
If issues persist despite efforts, consulting manufacturer instructions or professional help is wise. Visit [Espresso Tech Guide](https://coffeeaccessories.espressotechguide.com/contact-us) for guidance or troubleshooting. Staying informed about your specific model and updates helps maintain peak performance, reducing errors caused by outdated firmware or overlooked issues. Being proactive with support extends your scale’s lifespan and preserves the integrity of your brewing process.
Remember, consistent care transforms your scale from a potential source of frustration into a reliable partner in pursuit of espresso perfection. Make these steps part of your routine, and you’ll enjoy accurate measurements—the backbone of every great shot.
Many coffee enthusiasts assume that a perfectly calibrated tamper, a high-precision scale, or a sleek milk pitcher automatically leads to barista excellence. However, let’s dig deeper into the nuances often overlooked. Contrary to popular belief, the best espresso shots don’t hinge solely on gear: improper tamping pressure, neglecting scale calibration nuances, or using milk pitchers with unoptimized spouts can undermine your efforts, regardless of quality. For instance, believing that a pressure of exactly 30 pounds is universally ideal ignores the subtle variability in puck density and filter basket textures—factors that require a more sophisticated approach, as detailed in this in-depth guide.
Why mechanical consistency isn’t enough for perfect extraction?
Many assume that a uniform tamp or a digital scale that reads 0.01g accuracy guarantees perfect espresso. Yet, studies have shown that even with precise equipment, techniques like uneven tamping or inconsistent grind distribution are responsible for significant puck channeling, a common cause of under-extraction. This echoes findings from coffee science expert Dr. Scott Breakingham, who emphasizes that consistency in technique outweighs the marginal gains from ultra-high precision tools (source). Beware the trap of over-reliance on equipment calibration, which can mask fundamental technique flaws. When selecting a coffee scale, consider models that are resilient to static charge—an often underestimated enemy—by consulting this resource. Remember, gear optimization combined with technique refinement creates the true path to espresso mastery. Think of your tools as facilitators, not magic wands.
What about the myth of perfect latte art easily achieved?
Latte art aficionados often believe that the right milk pitcher alone can make or break their designs. While spout shape and temperature are critical, the real secret lies in milk consistency and pour technique—a nuanced skill honed over time. For advanced tip, check out comprehensive step-by-step advice. Mistakes like pouring from too high or inconsistent flow can ruin even the best design, regardless of equipment. This common oversight reveals that equipment is only part of the equation; mastery comes from understanding how every variable interacts during the pour. Stay aware of these subtle factors and you’ll avoid the trap of oversimplifying your barista arsenal. Have you ever fallen into this trap? Let me know in the comments.
Maintaining Your Equipment for Long-Term Success
One of the most overlooked aspects of espresso mastery involves consistent maintenance of your barista tools. Regular upkeep of your coffee scale, tamper, milk pitcher, and knock box ensures they continue performing at peak levels. For instance, frequently cleaning your milk pitcher—using methods detailed in this guide—prevents milk residue build-up that can affect pour quality and flavor. Incorporating a routine, such as weekly calibration checks for your scale or inspecting for sensor dust, helps prevent drifts in measurement accuracy over time. As this resource emphasizes, static buildup can silently undermine your scale’s precision, so proactive static management is critical. Developing a mindful maintenance schedule can extend the lifespan of your tools, save you money, and elevate your brewing consistency. I’ll admit, I once neglected cleaning my tamper and found my shots becoming uneven—once I adopted a weekly cleaning ritual, my puck quality dramatically improved. Regular upkeep is the foundation of stable, accurate measurements and consistent espresso.

**Pro Tip:** Use a soft, damp cloth with a mild cleaning solution to wipe down your tamper and scale. This prevents residue buildup that drifts calibration and measurement accuracy, forming the bedrock for reliable brewing.
How do I maintain my tools over time?
Implementing a routine checkup—calibrating scales, cleaning accessories, inspecting for wear—can dramatically improve long-term performance. Consider setting a weekly maintenance calendar, especially for your barista accessories. For scales specifically, staying aware of static charge issues through resources like this article ensures sustained accuracy. Don’t overlook simple steps—like wiping your tools after each use or replacing worn parts—as they significantly extend equipment life. Consistent maintenance can also preempt costly repairs or replacements down the line. As I’ve experienced firsthand, a little extra effort in upkeep leads to measurable improvements in shot quality and workflow confidence. Try scheduling a quick weekly cleaning and calibration check—your coffee will thank you. Remember, mastery isn’t just about new techniques but also about caring diligently for your trusted tools.
The Hidden Lessons That Changed My Approach to Brewing
In my journey to achieve espresso excellence, I realized that relying solely on high-end equipment isn’t enough. The most profound lessons came from troubleshooting, patience, and paying attention to details I once overlooked. For example, I learned that calibrating my coffee scale weekly was crucial, but understanding how static charges and dust affected accuracy was a game-changer—something I only discovered after a frustrating series of inconsistent shots. Embracing the complexity of tamping pressure and puck preparation taught me that technique often trumps gear, echoing what seasoned baristas understand deeply.
Where to Deepen Your Barista Skills
If you’re eager to elevate your coffee game, I highly recommend exploring resources that go beyond basic tutorials. The essential barista tools guide helped me select equipment that truly complements my workflow. Additionally, books like this comprehensive guide on tampers and milk pitchers offered insights that refined my pouring technique. Investing in continuous learning and quality tools has transformed my daily routine into a more confident and satisfying craft.
Ignite Your Espresso Passion Right Now
The journey to great espresso is ongoing, but every small improvement compounds into remarkable results. Whether you’re just starting or refining your skills, remember that consistent maintenance of your tools—like regular cleaning, calibration, and cautious handling—is the backbone of reliable brewing. Embrace the learning process, stay curious, and don’t hesitate to experiment with your setup. Your next perfect shot could be just a tweak away—so get out there and make every pour count!