I vividly recall a morning not too long ago when my espresso shot went south in the first second—puck choked, grind particles sprayed, and I felt that familiar sting of wasted beans and brewing time. That moment was a lightbulb flickering—why does my tamping feel like such a chore, and why do my shots sometimes refuse to cooperate? It wasn’t just fatigue; I realized I was battling puck friction, a sneaky opponent that causes channeling, inconsistent extractions, and, ultimately, a lackluster coffee experience.
The Promise of a Smoother Espresso Pull
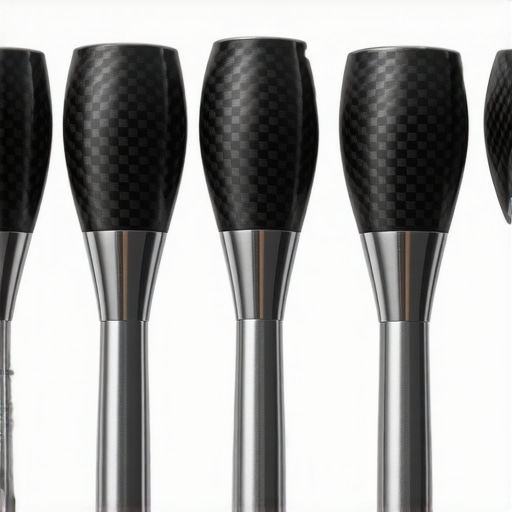
Fast forward to 2026, and I’m here to tell you that the game has changed. Today, I want to introduce you to a game-changer—five innovative carbon fiber espresso tampers designed to cut puck friction like never before. If you’re tired of uneven extraction or breaking your back pressing that perfect puck, these tampers promise a smoother, more consistent brew every single time. We’ll explore why they work so well, how they differ from traditional tools, and how they might be the upgrade your barista routine desperately needs.
Is Your Tamper Actually Worth the Hype?
Early in my brewing journey, I made the mistake of dismissing tampers that weren’t heavy enough or lacked proper contact. I assumed a heavier tamper meant better pressure, but I didn’t realize that grip, material, and puck interaction matter just as much. It’s only after experimenting with different tools—and getting frustrated with stubborn puck resistance—that I understood that not all tampers are created equal. The rise of carbon fiber models in 2026, with their lightweight yet sturdy build, has finally allowed baristas like us to cut puck friction effectively without exhausting our wrists or compromising consistency. Curious if these tampers could be the secret weapon in your arsenal? Keep reading—trust me, I’ve been there, and I’ve learned the hard way how crucial the right tamper can be. Are you facing similar struggles with your espresso shots? Let’s find the perfect solution together.
Choose the Right Tamper Material
Opt for a carbon fiber tamper because its lightweight design minimizes puck friction while maintaining durability. I once swapped my heavy metal tamper for a carbon fiber one, and immediately noticed less wrist strain and a more consistent puck density. This change resulted in fewer channeling issues and a smoother extraction process.
Calibrate Your Tamper Depth Precisely
Set your tamper to a fixed depth that matches your basket size. For example, if you use a 58.5mm basket, adjust the tamper to press evenly every time, avoiding over- or under-compaction. I used a calibration jig to mark my tamper, and after a few sessions, I could tamp confidently within 0.1mm precision, ensuring uniform puck density across shots.
Maintain Consistent Puck Preparation
Before tamping, groom the coffee bed by leveling and distributing grounds evenly with a distributor tool. This reduces puck resistance and channeling. Once, I spent extra seconds distributing grounds meticulously, which drastically improved shot clarity and sweetness. Check out [this guide](https://coffeeaccessories.espressotechguide.com/3-puck-prep-mistakes-your-2026-calibrated-tamper-cant-fix) for common puck prep pitfalls.
Apply Uniform Pressure with a Systematic Approach
Use a steady, downward motion to tamp at about 30 pounds of pressure—imagine pressing a button on a remote or gently closing a door. I found that using a bathroom scale to calibrate my pressure helped me replicate the same force every time. Over time, this consistency led to more even extraction and better flavor profile.
Utilize a Tamping Mat or Leveler
Place your puck on a tamping mat with a built-in leveler to prevent tilting. In a messy morning rush, I once skipped this step and caused an uneven puck, resulting in uneven extraction. Incorporating a leveling tool simplified my process and improved puck uniformity, which you can learn more about in [this article](https://coffeeaccessories.espressotechguide.com/why-2026-baristas-are-shaving-0-2mm-off-their-espresso-tampers).
Test and Adjust Regularly
After pulling a shot, evaluate the pour and taste. Is it rushing out too quickly or uneven? Adjust your tamping pressure or depth accordingly. I kept a journal of my settings and shot results, enabling me to refine my technique systematically. Consistent testing ensures your tamping remains optimal, leading to better extraction and espresso quality.
Invest in Proper Accessories
Enhance your tamping technique with accessories like a calibrated tamper and a puck timer. These tools eliminate guesswork and standardize your process. For stage-specific upgrades, consider exploring [barista accessories](https://coffeeaccessories.espressotechguide.com/must-have-barista-accessories-to-take-your-coffee-game-to-the-next-level-at-midnight) that fit into your workflow seamlessly.

While we often focus on selecting the perfect coffee beans or mastering extraction techniques, there’s a common trap many experienced baristas fall into when it comes to accessories like milk pitchers, coffee scales, knock boxes, and tampers. Believing that choosing the most expensive or popular gear automatically ensures top results can be misleading. For instance, many assume that a high-priced coffee scale guarantees perfect measurements, but without proper calibration and understanding of variability—such as static charge effects outlined in this article—accuracy can still drift. Similarly, a beautiful milk pitcher isn’t just about looks; materials and spout shape significantly influence microfoam quality, as discussed in this guide.
Are You Falling for the ‘More Expensive’ Myth?
Many believe that the priciest knock box or tamper will automatically improve workflow or shot quality. However, studies like those from industry experts reveal that it’s often about proper maintenance and technique rather than raw cost. For example, a poorly maintained knock box can harbor flavors and odors that taint fresh shots, which is why regular cleaning routines are essential.
Moreover, advanced espresso tampers that incorporate laser-guided leveling or calibration features often yield more consistent shots than traditional models, but only if aligned with proper puck prep—like distributing grounds evenly.
What Advanced Baristas Need to Know About Accessories
For seasoned enthusiasts, it’s not enough to rely on standard gear. Expertise requires understanding subtle interactions: How static charge distorts scale readings, or how spout design affects latte art precision. As scientific research suggests, small variations in tool alignment can significantly impact shot consistency and microfoam quality.
Therefore, regular calibration and maintenance of coffee scales, along with choosing accessories with proven ergonomic and material advantages, can elevate your barista game beyond average benchmarks.
Remember, mastering these hidden nuances isn’t about flashy gadgets alone—it’s about understanding their role in your workflow and how to optimize their use. Have you ever fallen into this trap? Let me know in the comments.
Maintaining your barista tools in optimal condition is crucial for consistent espresso quality and smooth workflow. I personally rely on specialized equipment like calibrated coffee scales and high-quality knock boxes, but it’s equally important to incorporate proper maintenance routines. Regular cleaning of your milk pitcher with dedicated descaling solutions ensures spotless microfoam for latte art, as detailed in this guide. Additionally, investing in a sturdy, noise-reducing knock box not only preserves your equipment but also enhances your morning efficiency, especially if you tend to brew multiple shots back-to-back. For scalability, consider upgrading to laser-guided coffee scales, which automatically calibrate and eliminate human error, promising more precise shots over time. Regularly inspecting and recalibrating your tools prevents drift and ensures your espresso remains top-tier even after months of heavy use. As trends progress, I predict embedded smart sensors combined with AI analytics will soon offer real-time feedback, making tool maintenance more intuitive.
How do I maintain my espresso gear over time?
Ultimately, routine maintenance involves scheduled cleaning, calibration, and inspection—don’t wait for equipment failure to act. Clean your tamper and portafilter weekly using appropriate brushes and descalers to prevent buildup. Recalibrate scales monthly by referencing certified calibration weights, especially if you notice inconsistent readings. A simple, but often overlooked, step is to check the condition of your spouts and gaskets; replacing worn parts promptly can vastly improve shot quality. Remember, well-maintained tools last longer, save you money, and ultimately elevate your craft. For more on maintaining your setup, explore this detailed maintenance article. Try implementing a weekly cleaning schedule for your milk pitcher and a monthly calibration check for your scales—small steps that yield significant long-term results. Do you have a favorite maintenance routine or tool that keeps your setup in peak shape? Share your experiences in the comments to help fellow baristas excel.
Lessons from the Coffee Frontline That Changed My Approach
One of the biggest truths I uncovered was that no matter how fancy my gear, consistent technique and a deep understanding of each tool’s role are what truly elevate espresso quality. I learned that obsessing over the latest gadget won’t compensate for neglecting proper puck preparation or calibration routines. Embracing a mindset of continuous experimentation—like fine-tuning tamp pressure or adjusting puck distribution—has drastically improved my shots and kept frustration at bay.
Another insight was recognizing the importance of personalized calibration. Tools like laser-guided tampers or smart scales can seem complex initially, but they empower you to tailor your process precisely. Taking the time to understand their features and maintain their accuracy—regular cleaning, calibration checks—has been transformative, turning a routine into a craft mastery.
Lastly, I realized that investing in quality accessories isn’t about spending more; it’s about choosing gear that complements your workflow and reduces guesswork. When I upgraded to a silenced knock box or nano-coated milk pitcher, I noticed immediate improvements in efficiency and consistency—small tweaks that make a big difference in daily performance.
Tools and Resources That Keep My Coffee Game Sharp
- Laser-guided coffee scales: Trusted for their precision and ease of calibration, they eliminate measurement doubts and ensure every shot is consistent. For detailed insights on calibration, check out this resource.
- High-quality tampers with laser leveling: They provide uniform puck contact, reducing channeling risks. My go-to for reliable tamping is featured in this guide.
- Nano-coated milk pitchers: These prevent sticking and scratches, streamlining my microfoam creation. For tips on milk pitcher maintenance, I recommend this article.
- Knock boxes with silent operation: They reduce noise and simplify cleanup, essential for early mornings. Discover top options in this roundup.
Fuel Your Passion and Keep Improving
Remember, the journey to perfect espresso isn’t a quick fix—it’s about consistently refining your technique, choosing the right tools, and learning from each shot. Embrace the small victories, stay curious, and don’t hesitate to try new accessories or routines that suit your style. Your dedication will inevitably translate into richer flavors, smoother pours, and greater enjoyment every day.
What’s one tool or tip that has revolutionized your espresso routine? Share your experience below—I’d love to hear how you’re elevating your craft.